Cellphones sharing stuff
Hello! like I promise in the previous post I'll continue with the first of two post related to music in which I'll use the music symbols that I created before.
Like some people know, I work in a company that sells things related to cellphones, things like images, ringtones and other stuff, so I came with the idea of two cellphones sharing stuff. I hope you enjoy this Inkscape tutorial and let's get started.
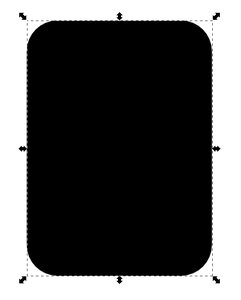
First we need to draw the "cellphone boy", so using the Rectangle tool draw a rectangle with rounded corners. Choose black for the fill color and the stroke none (FIGURE 1).

FIGURE 1 Cellphone boy basic shape.
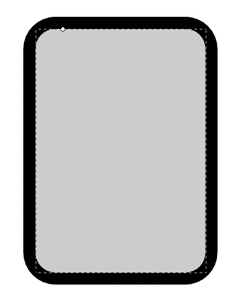
Now comes a tip that I brought from the Flash world (thanks to Chris Georgenes), this tip consist in selecting the just created cellphone shape and duplicate it (Edit > Duplicate), then pick a kind of gray color for the fill of the new just created rectangle (remember to keep the stroke to none), after that (always selected the gray rectangle) go to Path > Dynamic Offset to make the gray rectangle smaller. In this way the first black rectangle becomes the "outline" of the gray rectangle (FIGURE 2).
But you'll probably may be guessing why just don't add the stroke to one single rectangle, well it depends but with this technique you can achieve an outline with a varied weight, that sometimes is a nice thing to pursue. Other thing that you gain is at the time of scaling, because the scaled shape will be scaled uniformly, both the outline and the fill (because they are different objects). I make some experiments with scaling shapes with stroke and fill (both in the same object), and sometimes only the fill scales but the stroke doesn't.

FIGURE 2 Use Dynamic Offset to scale the duplicated rectangle.
After that we need some special shapes to use it for giving our cellphone boy some volume. To do that duplicate the gray rectangle and drag it to some free space in your page or canvas, then create a "helper" rectangle and arrange the two shapes in a way we can cut and get the shape that we want. Then select both rectangles and do Path > Difference. (FIGURE 3)

FIGURE 3 Using a helper rectangle to get the special shape that we want.
Duplicate the just created shape and then flip it horizontally. After that change the fill color of the two shapes to a darker shade of gray than the base rectangle. Using the align panel, position the the two shapes at both sides (left and right) of the gray base rectangle, then apply some blur (maybe 4 is ok). Repeat the process for the top and bottom highlights shapes (FIGURE 4).

FIGURE 4 The special shapes add volume (highlights and some shadows) to our cellphone.
Now we are going to add the screen and number buttons to our cellphone, to do that just use some rounded rectangles, notice that in the screen I used two rectangles, the one that is in the background haves a linear gradient with a diagonal orientation (FIGURE 5).

FIGURE 5 Adding the screen and buttons to our cellphone.
Finally add the face to our rectangle, using the circle tool for the eyes and the pen tool (Bezier Path Tool) or the pencil tool to do the eyebrows (FIGURE 6).
FIGURE 6 The final cellphone.
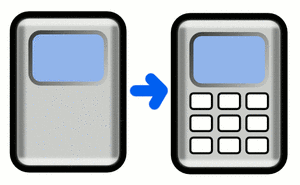
We are done with this tutorial but don't stay here and go further. Be creative and put this cellphone boy character to work or do something. Mine is below sharing some stuff with his cellphone girlfriend. (FIGURE 7)

FIGURE 7 Two cellphones sharing some stuff.
Inkscape Source File: cellphones_sharing


/https%3A%2F%2Fstorage.canalblog.com%2F72%2F48%2F388561%2F52220951_o.jpg)
/http%3A%2F%2Ffarm3.static.flickr.com%2F2702%2F4299690854_4a0b05de8f_m.jpg)
/https%3A%2F%2Fstorage.canalblog.com%2F99%2F61%2F388561%2F47238759_o.png)
/https%3A%2F%2Fstorage.canalblog.com%2F92%2F09%2F388561%2F42595048_o.jpg)